First AutoDiscovery
AutoDiscovery is the main way to integrate your network inside Avalon.
One of the main goals of Avalon is to be able to draw your network in a standard way so we have clean and neat schemas of all your sites.
Access the AutoDiscovery
The main access to the AutoDiscovery feature is to create a map: Access the tenant creation menu by navigating with the top tabs menu Production → Maps There you will create a first map by clicking on the New button, lets call it Site1
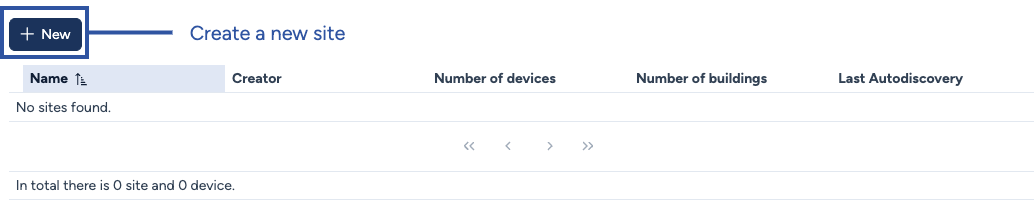
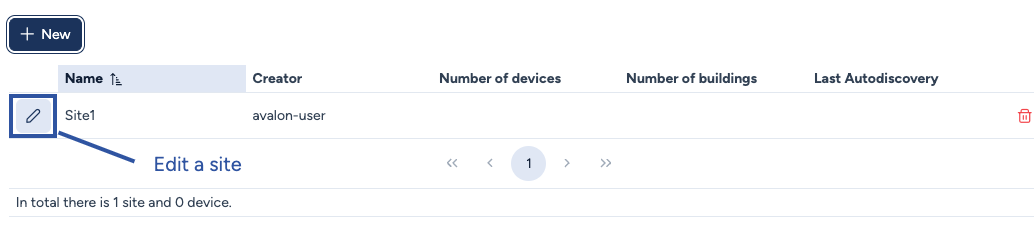
The site will show in the datatable presenting all the tenants sites.
You will now enter the map of your newly created site by clicking on the pencil on the left of the site's name.
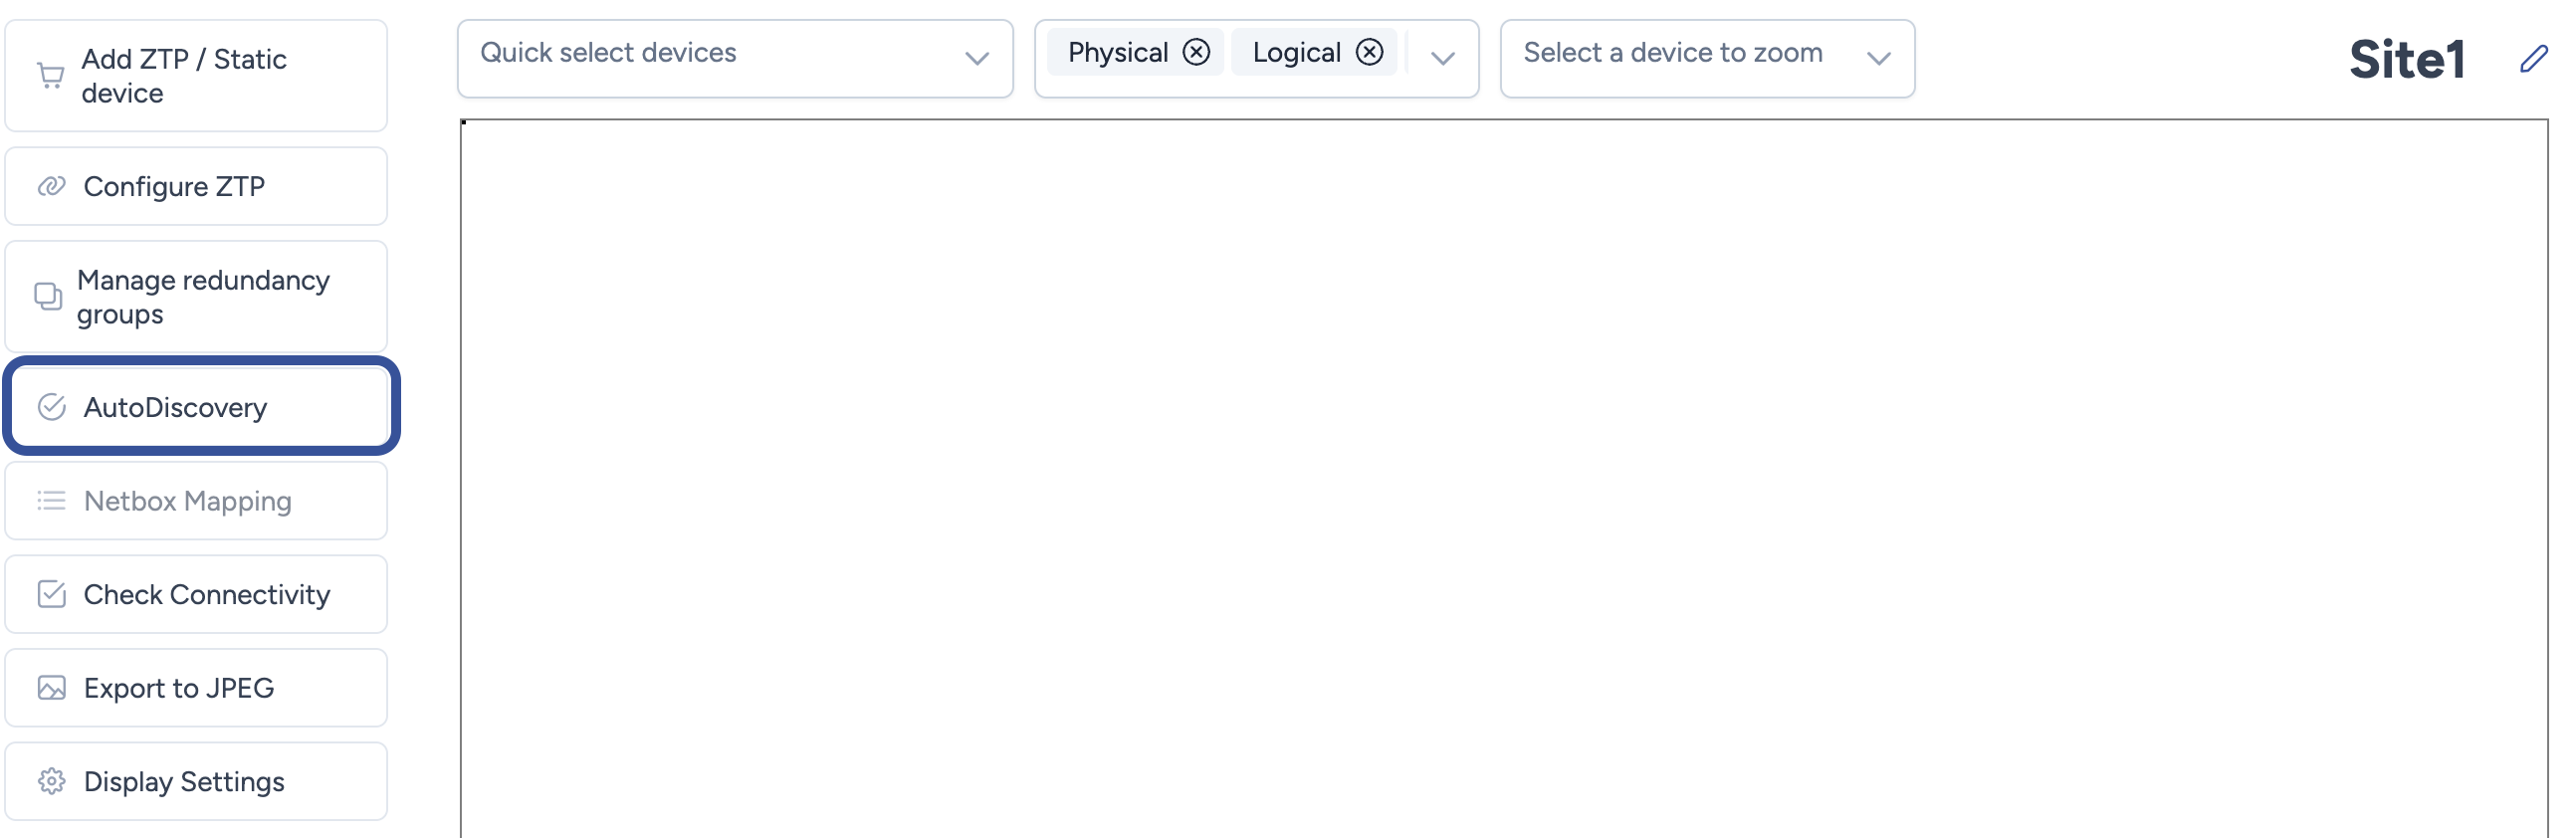
Once in the map display, you will see the feature-specific submenu appearing on the left panel.
There you will find an item called AutoDiscovery and you will click on it.
Configure the AutoDiscovery
AutoDiscovery inventory
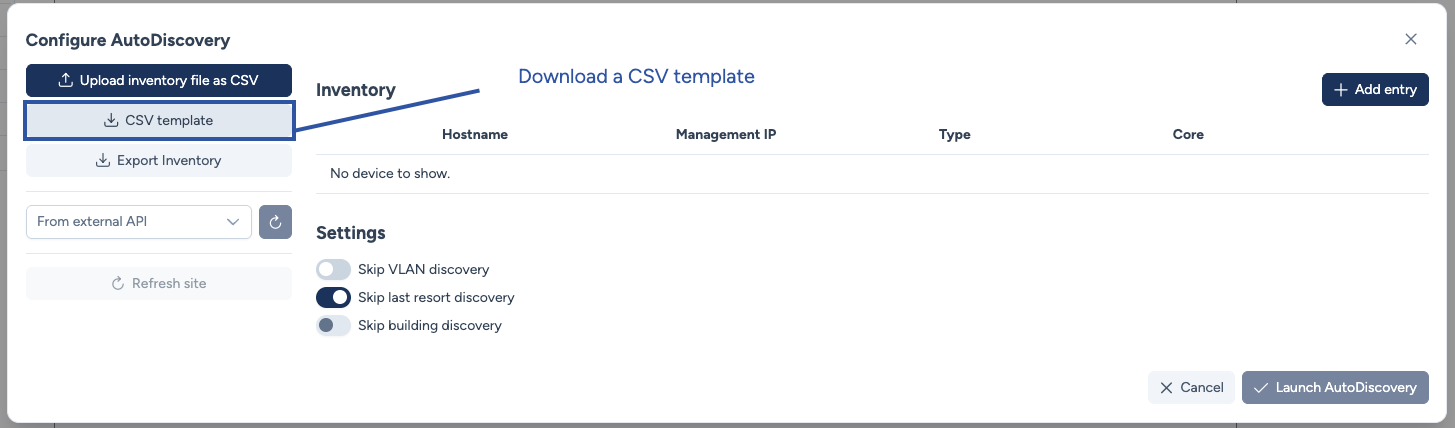
A modal window will open allowing you to configure AutoDiscovery.
Note
We will not describe all settings available for the AutoDiscovery process, please refer to the Detailed documentation to learn more on the AutoDiscovery options.
There are four ways to create an inventory for the AutoDiscovery process:
- Use a CSV file
- Use a Source of Truth (SoT) like Netbox
- Refresh the site based on the state of Avalon's DB
- Manually add devices directly in the datatable of the modal . This ability can be combined with any other previous method.
Only options 1 and 4 are available right now because we did not configure an external API and this site has not been discovered yet.
Roadmap
Auto-discovery using IP ranges is not currently supported. A predefined inventory is required at this time. Support for IP range–based discovery is planned for Q2 2026.
Use a CSV template
Let's use option 1 and create a CSV file. You can use the button ![]() CSV template
CSV template
The CSV template allows you to define the following data for each host:
| Property | device_hostname | device_mgmt_ip | is_core | device_type |
|---|---|---|---|---|
| Mandatory | Yes | Yes | No (at least one must be defined) | No |
| Type | Free text | IP address | Boolean (true/false) | Text referring to a type in the DB |
| Description | Hostname of the device | Management IP of the device | Core device? | Type of device (e.g., router, l2_access_switch) |
Inventory constraints as of 1.4.0, juillet 2026
- At least one 'Core' device must exist in the inventory; otherwise, the process cannot be launched.
device_typemust be chosen from the device types defined in Administration > Device Types.device_hostnamemust match the device's hostname when connecting (case-insensitive).
Note
Your CSV can be incomplete, for instance you may not have defined a core device.
The CSV will still be imported into the AutoDiscovery modal and you will be able to modify device properties directly in the Datatable.
Let's import an incomplete CSV with just hostnames and IP address:
device_hostname;device_mgmt_ip;is_core;device_type
CORE;192.168.255.1
AGGREG-1-1;192.168.255.2
AGGREG-1-2;192.168.255.27
AGGREG-2;192.168.255.10
AGGREG-3;192.168.255.3
AGGREG-4-1;192.168.255.19
AGGREG-4-2;192.168.255.20
ACCESS-1-1a;192.168.255.4
ACCESS-1-1b;192.168.255.9
ACCESS-1-2;192.168.255.5
ACCESS-2-1;192.168.255.12
ACCESS-2-2;192.168.255.7
ACCESS-3-1;192.168.255.6
ACCESS-4-1;192.168.255.24
ACCESS-4-2a;192.168.255.14
DC-1;192.168.255.13
RT-1;192.168.255.25
You can use the button ![]() Upload inventory file as CSV to import your inventory inside the modal.
Upload inventory file as CSV to import your inventory inside the modal.
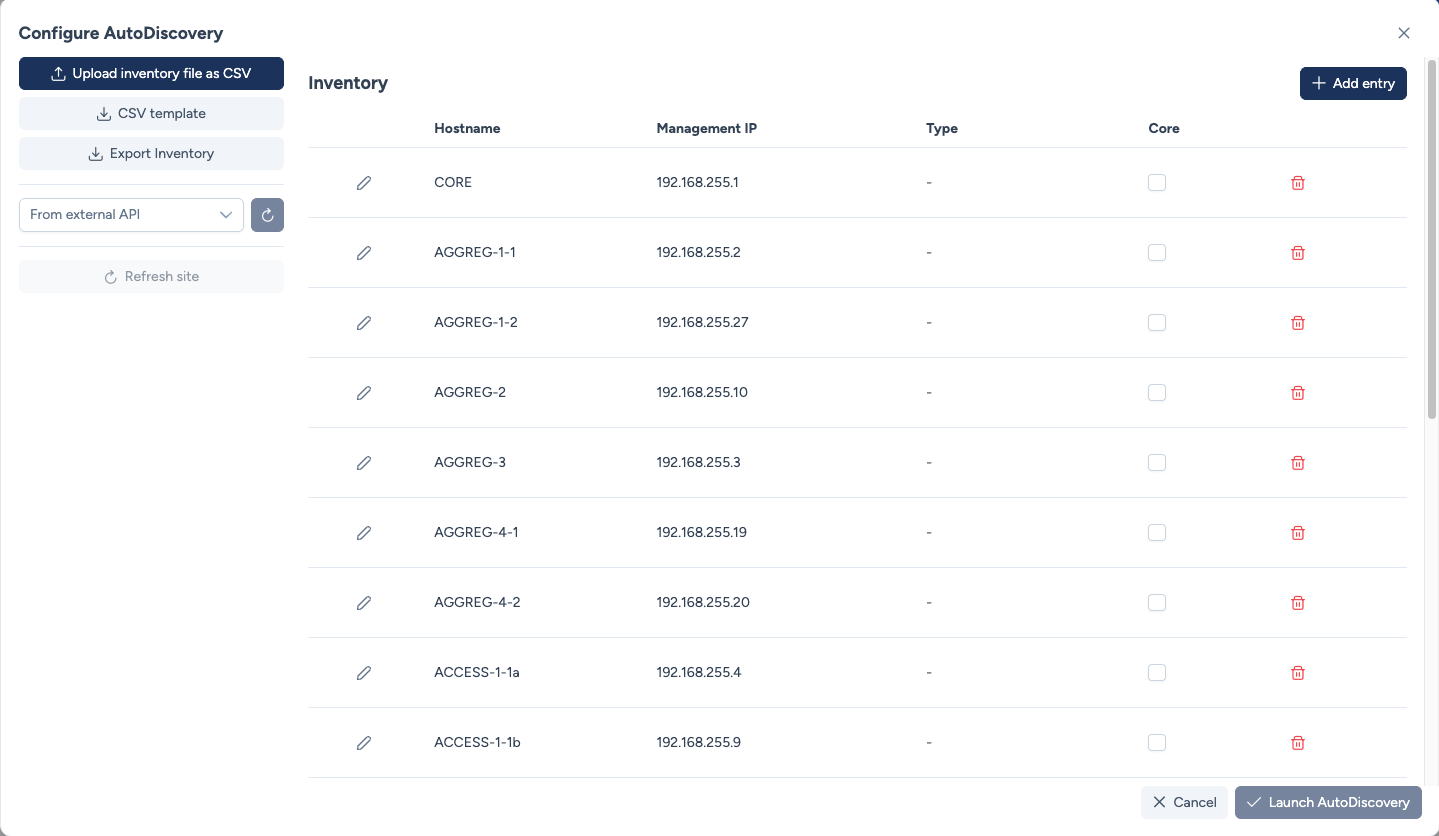
As you can see the Launch AutoDiscovery button is not yet enabled because no device has been defined as the core of the site.
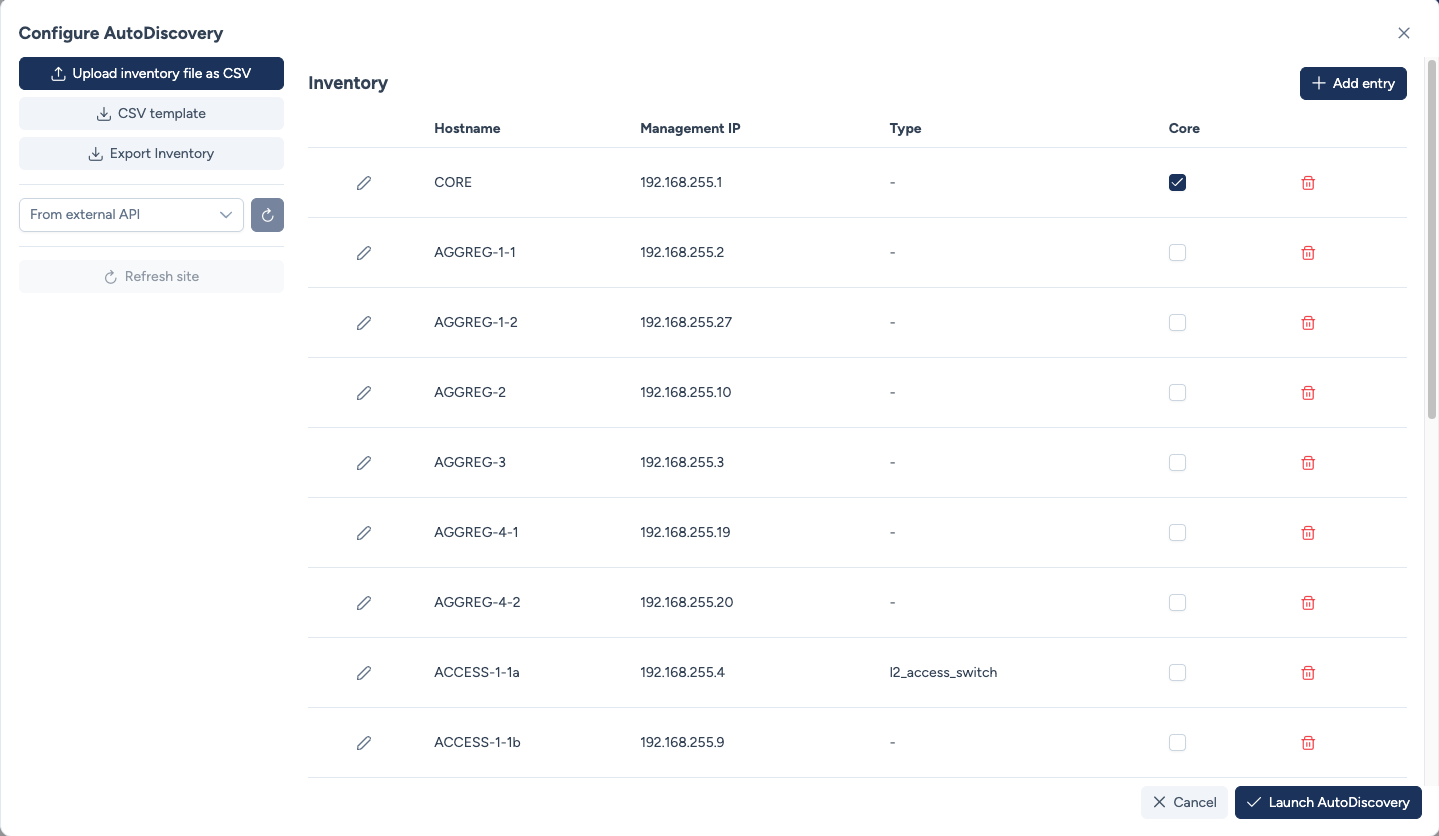
You can click on the pencil of one of your device(s) and click on the checkbox to define one or more core device(s).
In this example we will also specify the device_type l2_access_switch for ACCESS-1-1a which will be classified otherwise by Avalon as an aggregation switch because it has a downstream neighbor which is ACCESS-1-1b.
We will also tell Avalon that RT-1 is a router and DC-1 a core_dc_switch.
Neighbors in Avalon
In Avalon, Device B is considered a downstream neighbor of Device A if Device B is connected to Device A and is located farther from the core.
Conversely, Device A is an upstream neighbor of Device B.
AutoDiscovery process
Now the inventory is valid, you can launch the process with the Launch AutoDiscovery button.
The AutoDiscovery process will connect to each device of the inventory using the credential resolution mechanism.
The whole process is available in the Detailed documentation, here is a summary:
- Platform detection: Avalon will try to determine which platform it is connected to.
- Neighboring: The next step is to find how device are connected together. We use the following protocols to find physical connections between devices:
- CDP
- LLDP
- LACP
- STP
- Technology discovery: the next step is to gather which technologies are deployed on the devices, this will mainly include standard technologies as VLANs, IP addresses, VRF, aggregates but also stacking and High Availability technologies.
- Finally, the process registers all data into the DB, calculates devices position on the map while putting the core(s) device(s) at the center and drawing star like diagrams around the core(s).
At the end of the process the page automatically reloads and displays the site diagram.
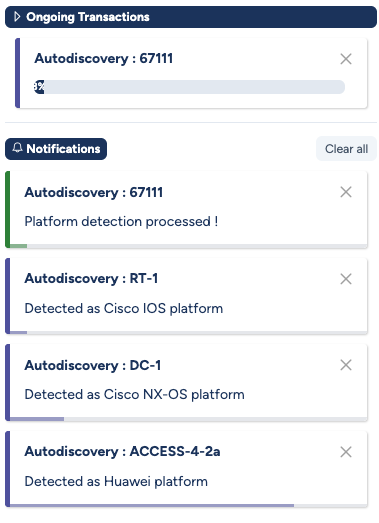
Notifications
During the process, temporary notifications will appear on the right panel.
At the top of this panel, you will also see that a transaction with a unique ID has been created. This allows you to monitor the overall process by showing the percentage of completion.
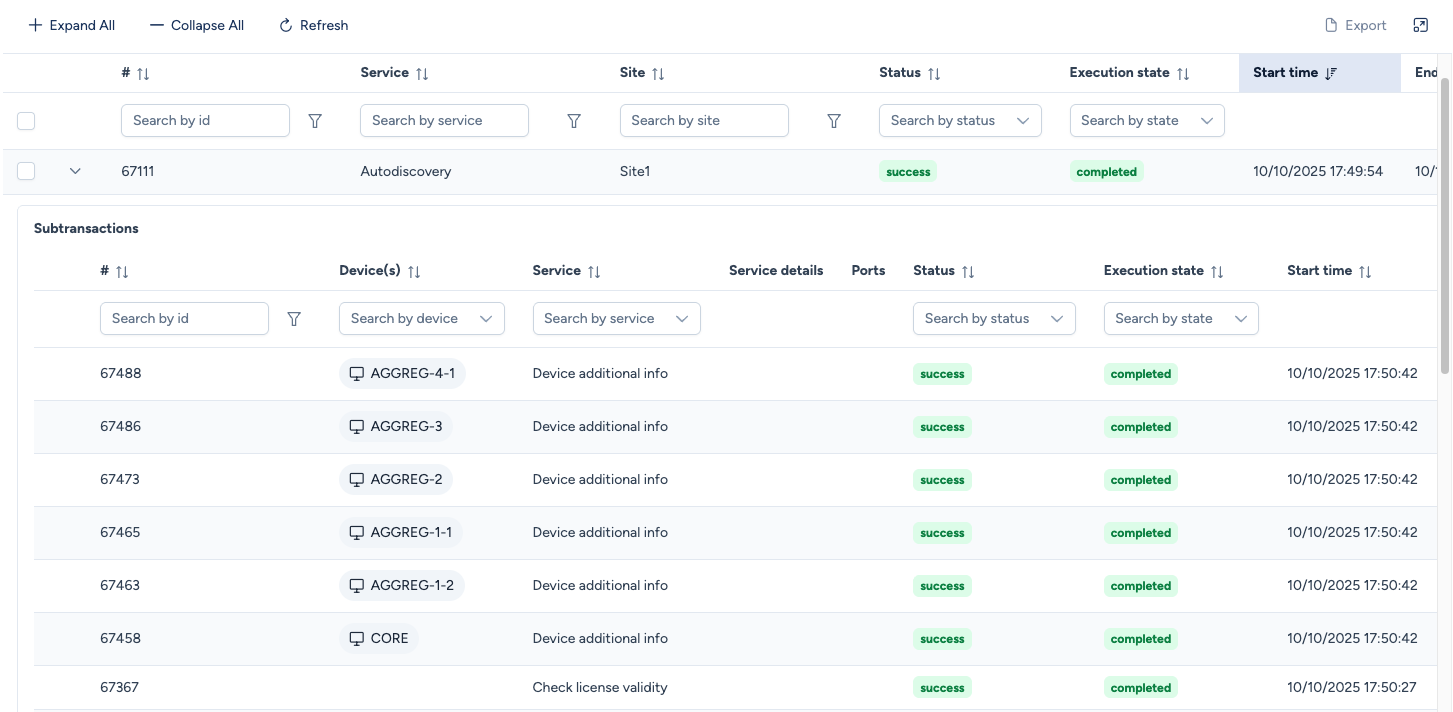
Transactions
Transaction details can be found under Production → Transactions.
Each transaction consists of one or more subtransactions. In certain cases, you will see messages associated with a subtransaction, which provide insights into how specific tasks were performed.
Result
Finally, the network map should be displayed on the screen:
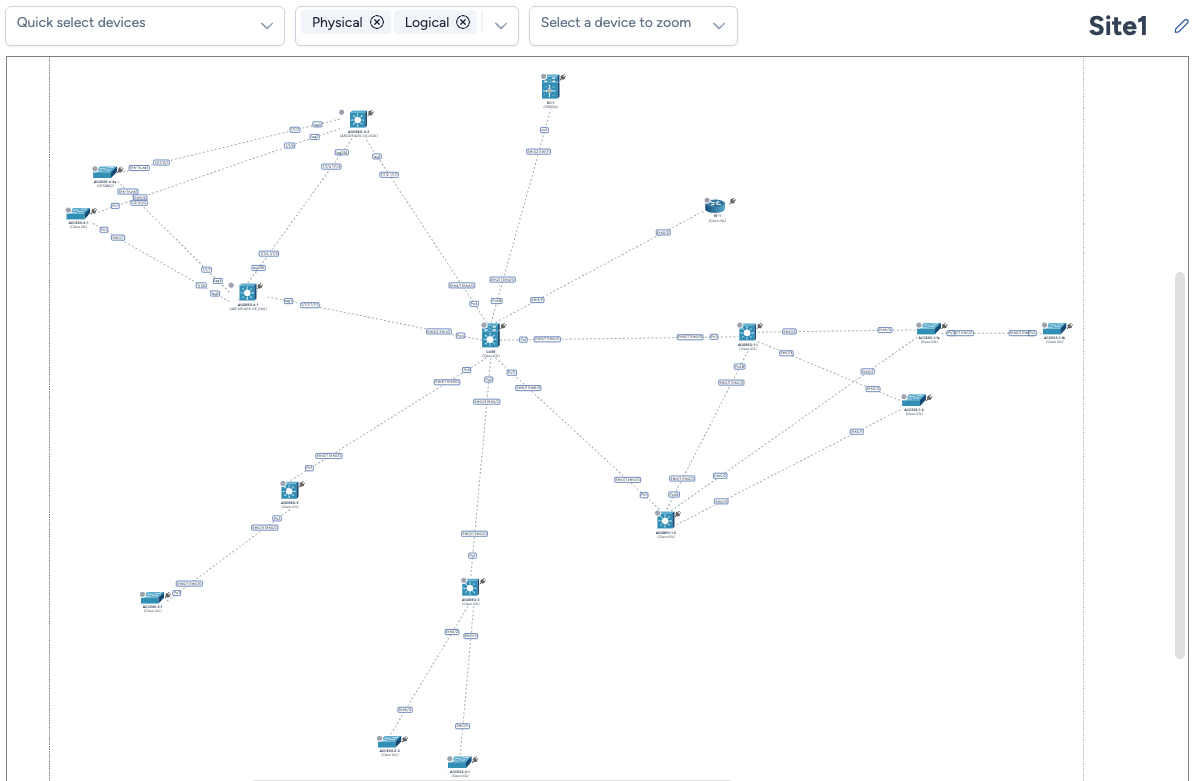
Congratulations!
You have successfully integrated your first site into Avalon! Now it's time to explore all of Avalon's features in depth with the Detailed Documentation.